
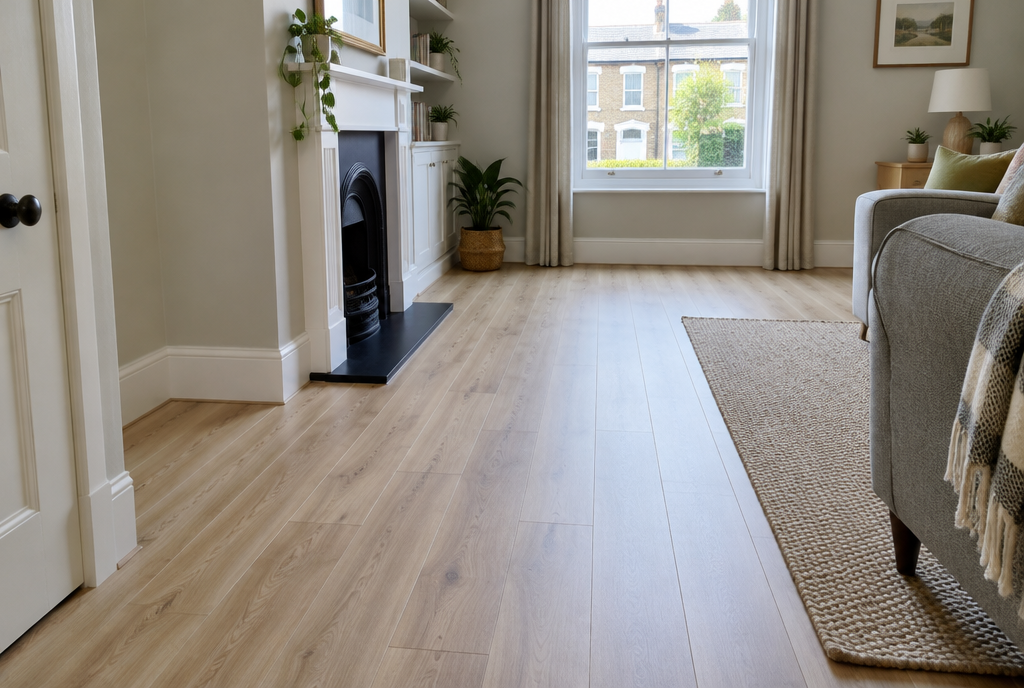
Learning how to lay laminate flooring is one of the most satisfying DIY jobs going: a click-together floor can transform a tired bedroom or living room in a weekend. The planks are forgiving, but the finish depends on the boring bits – letting the boards settle, getting the subfloor flat and dry, and leaving the right gap at the edges. Here’s the whole job, the way UK manufacturers and retailers recommend it.
This guide contains affiliate links. If you buy through them, we may earn a small commission at no extra cost to you. As an Amazon Associate I earn from qualifying purchases. Read our affiliate disclosure.
At a glance
- Difficulty: Moderate – the prep, door frames and last row need patience.
- Time needed: At least 48 hours to acclimatise the boards, then roughly a day for an average bedroom, or a weekend for a first-timer tackling a larger room with doorways and pipes.
- Best time to do it: Any time of year, as long as the room is at normal living temperature – not a cold, unheated room or straight after plastering or screeding.
- Best for: Bedrooms, living rooms, hallways and dining rooms with a sound, level subfloor. Check the product carefully before using it in kitchens or bathrooms.
Before you start: know what you’ve got
Laminate is a “floating” floor: the planks lock to each other, not to the floor beneath, and sit on underlay. Because it’s mostly wood fibre, it swells slightly in humid air and shrinks in dry air. Most laminate problems – gaps opening, joins lifting or “peaking” – come from ignoring that movement.
Your subfloor
Lift the old carpet and have a proper look at what’s underneath. In most UK homes you’ll find one of these:
- Timber floorboards on joists – typical upstairs, and downstairs in many Victorian and Edwardian terraces. Fix loose or squeaky boards first.
- Chipboard or OSB sheets – common in newer houses. Check for swollen edges where there’s been a leak.
- Concrete slab or sand-and-cement screed – most post-war ground floors. These can hold moisture, so you’ll need underlay with a damp-proof membrane (DPM) or a separate polythene sheet.
- Old vinyl or tiles – some manufacturers allow laminate over sound, well-stuck vinyl or lino with a damp-proof underlay. Carpet must always come up.
A warning about old floor tiles: small square tiles (often 9 or 12 inches), especially brittle thermoplastic tiles, and black bitumen adhesive found in pre-2000 homes may contain asbestos. Asbestos was banned in the UK in 1999, but plenty of older floors still contain it. Don’t sand, break or scrape them up. If they’re intact, the safest option is usually to leave them and float the new floor over the top with a suitable underlay. If you need them gone, get a sample tested and follow HSE guidance, or use a licensed asbestos contractor.
How flat and dry does it need to be?
Flatter than you’d think. Quick-Step’s installation instructions, for example, say unevenness of more than 4 mm over 2 metres should be levelled out before you lay their planks, and they ask for new cement screed to be dried below 2.5% CM (75% relative humidity). Their rule of thumb is about a week of drying per centimetre of screed for the first 4 cm, so a freshly screeded floor can need a couple of months. Laying a straightedge or long spirit level across the floor in several directions will show you any dips or humps. Small dips can be filled with floor levelling compound; high spots on boards can be planed or sanded down.
Choosing laminate and underlay
UK laminate is usually sold in thicknesses of around 7 mm to 12 mm. Thicker boards feel more solid and hide minor imperfections better; the AC rating (AC3, AC4 and so on) shows how hard-wearing the surface is, with higher numbers suiting busy hallways. Standard laminate doesn’t like standing water, so for kitchens and bathrooms look for planks specifically sold as water-resistant and follow that maker’s rules for wet rooms.
Underlay matters too: foam is fine over timber, fibreboard helps smooth old floorboards, and underlay with a built-in DPM is the one for concrete. If you have underfloor heating, choose an underlay rated for it and check the laminate is compatible too. If you live in a flat, check your lease before you buy anything: many leases require a specific acoustic underlay, or don’t allow hard floors at all, because of noise to the flat below.
What you’ll need
- Laminate flooring packs: measure the floor area in square metres and, as The Range’s guide suggests, add about 10% for cuts and waste (buy all packs from the same batch)
- Underlay suited to your subfloor (with a DPM over concrete) and underlay tape
- A laminate fitting kit: spacers, tapping block and pull bar
- Rubber mallet or a hammer used only with the tapping block
- Tape measure, pencil and try square
- A saw: a fine-toothed hand saw, jigsaw, mitre saw or a laminate cutter
- Flat wood bit or hole saw (for radiator pipes), and pipe collars
- Panel saw or multi-tool for undercutting door architraves
- Scotia or beading, plus threshold strips for doorways
- Knee pads, dust mask, safety glasses and ear defenders for power tools
Step 1: Acclimatise the boards
Lay the packs flat in the middle of the room you’re flooring, away from cold outside walls and radiators. Most manufacturers ask for at least 48 hours; Quick-Step specifies 48 hours in unopened packs at 15–22°C and 30–75% relative humidity. Keep the heating at its normal setting, so the boards reach the same moisture level as the room before they’re locked together.
Step 2: Clear and prepare the room
Empty the room, take up the old carpet, gripper rods and staples, then vacuum thoroughly – a bit of grit under the underlay can become a creak later. Screw down loose boards, punch nail heads below the surface and level any dips, letting levelling compound dry fully.
Decide on the skirting now: removing and refitting it hides the expansion gap completely, while leaving it and adding scotia beading is quicker and perfectly acceptable.
Step 3: Plan the direction and the last row
Laminate usually looks best running along the longest wall or towards the main window, so light runs along the joins. Over floorboards, laying across them gives better support.
Measure the room’s width and divide by the visible width of one plank. If that leaves a thin strip for the last row, cut down the first row instead. The Range recommends a last row of at least 60 mm; Quick-Step says to adjust if it would be under 50 mm.
Step 4: Lay the underlay
Roll out the underlay a strip at a time, as the manufacturer’s instructions say. Butt the edges without overlapping (overlaps create ridges) and tape the seams. If you’re using a separate polythene DPM over concrete, overlap those sheets by the amount stated in the instructions, tape them, and turn the edges a little way up the wall. Only lay a few strips ahead so you don’t tear it.
Step 5: Lay the first row with spacers
Start in a corner along your straightest long wall, with the tongue side of the planks facing the wall (or as your product’s instructions show). Many fitters cut the tongue off this row so it sits cleanly against the spacers. Put spacers between the boards and the wall every 40–50 cm, and at the ends too.
The expansion gap is the single most important measurement in the job. Figures vary by product: Quick-Step asks for 8–10 mm, while The Range’s general guide uses 12 mm, so use whatever your laminate’s own instructions say. Leave the same gap around pipes, door frames and anywhere the floor meets a fixed object such as a kitchen island or fireplace hearth. Walls are rarely straight, so check the first row with a string line – if it wanders, every row after it will too.

Step 6: Click the rows together and stagger the joints
Start the second row with the offcut from the end of the first row, as long as it’s a decent length (The Range suggests at least 300 mm). This automatically staggers the end joints and cuts down waste. Quick-Step asks for end joints in neighbouring rows to be at least 30 cm apart; a random stagger looks more natural than a step pattern and makes the floor stronger.
Most modern laminate uses an angle-and-drop system: hold the new plank at an angle of roughly 20–30 degrees, push its long edge into the previous row, then lower it flat until it clicks. Close the short end joint with a tapping block and a few light taps. Never hit the board edge directly with a hammer, because you’ll crush the locking profile and the joint will never close properly. Run your hand along each finished row: there should be no lip or gap. If there is, lift the board and try again rather than forcing it.

Step 7: Cut around door frames and radiator pipes
Door frames: rather than scribing around the architrave, undercut it. Rest an offcut of plank on a scrap of underlay against the frame, lay a panel saw or multi-tool blade on top and cut through. The floor then slides underneath, hiding the expansion gap. Check the door still swings freely; you may need to trim its bottom.
Radiator pipes: measure and mark the centre of each pipe on the board, allowing for the expansion gap. The Range’s guide recommends drilling a 30–32 mm hole with a flat wood bit or hole saw, which leaves room for movement around a standard 15 mm pipe. Cut a wedge from the holes to the board’s edge, fit the board, then glue the wedge back behind the pipe (glue on board edges only, not the underlay). Pipe collars hide the hole.
Step 8: Fit the last row
The final row nearly always needs cutting lengthways. Lay a full plank directly on top of the last complete row, then place another plank on top of that, pushed against the wall spacers. Draw along its edge onto the plank underneath, and you’ve got your cut line with the expansion gap built in. Because walls aren’t straight, measure at both ends of each board. Use the pull bar and a mallet to draw the last boards tight into the previous row, as there’s no room to use a tapping block against the wall.
Step 9: Finish the edges and doorways
Remove all the spacers. Refit the skirting, or pin or glue scotia beading to the skirting (not to the floor), so the laminate can still move underneath it. Fit threshold or transition strips in doorways and where the laminate meets another floor covering. Quick-Step’s instructions also call for an expansion joint where a floor runs more than 13 metres in either direction, and many manufacturers want a break at each doorway between rooms. Fit felt pads to furniture legs before moving it back.
Common mistakes to avoid
- Skipping acclimatisation. Cold boards can expand once they warm up, causing joints to peak.
- Butting the floor tight to walls, pipes or kitchen units. With no gap, the floor will buckle.
- Fixing the floor down. Nailing scotia into the laminate stops it floating.
- Laying over damp concrete without a DPM. Moisture rising from the slab will swell the boards from below.
- Ignoring dips and humps. An uneven subfloor makes joints flex, click and eventually break.
- Staggering joints too closely. End joints that line up, or sit only a few centimetres apart, weaken the floor and look wrong.
- Hitting boards directly. Always use a tapping block or pull bar to protect the locking edges.
When to call a professional
Get help if suspected asbestos tiles or adhesive need removing, if a concrete floor looks damp (dark patches, white salts, a musty smell), or if you find rotten joists. A fitter is also worth it for large open-plan areas or rooms with underfloor heating. If a radiator needs removing or pipes need rerouting, call a plumber, and if floor sockets or wiring are in the way, use a qualified electrician.
Frequently asked questions
Can I lay laminate directly on floorboards?
Yes, as long as the boards are secure, flat and dry, and you use underlay between them. Screw down any loose or squeaky boards first and lay the laminate at right angles to them where possible. Fibreboard underlay is useful for smoothing out minor unevenness in older boards.
Do I need to remove skirting boards to lay laminate?
No. Removing and refitting the skirting gives the cleanest finish, but most people leave it in place and cover the expansion gap with scotia or beading. Just make sure the beading is fixed to the skirting, not to the floor.
How big should the expansion gap be?
Follow the instructions in your packs, as it varies by product. Quick-Step specifies 8–10 mm, and general retailer guides often say 10–12 mm. Leave the gap everywhere the floor meets a wall or fixed object, including pipes and door frames.
Can laminate go in a kitchen or bathroom?
Standard laminate isn’t designed for wet areas, as water getting into the joints makes the core swell. Some ranges are sold as water-resistant and are approved for kitchens or bathrooms; if you choose one, follow that manufacturer’s rules on sealing edges and gaps. For a bathroom, vinyl or tiles are usually the safer choice.
Related guides: How to Fix Squeaky Floorboards · How to Fix a Sticking Door · How to Lay Peel and Stick Vinyl Flooring
Our picks for this job
These three make laying laminate faster, neater and much less likely to go wrong.

Laminate fitting kit
Spacers, tapping block and pull bar in one set – the three things that protect the joints and keep your expansion gap even.

Underlay with built-in DPM
Essential over concrete or screed to stop moisture reaching the boards, and it cushions and quietens the floor.

Laminate flooring cutter
Makes clean cross cuts right in the room with far less dust than a saw, so you are not walking back and forth.
Buttons go to Amazon UK. If you buy, we may earn a small commission at no extra cost to you.
Leave a Reply