
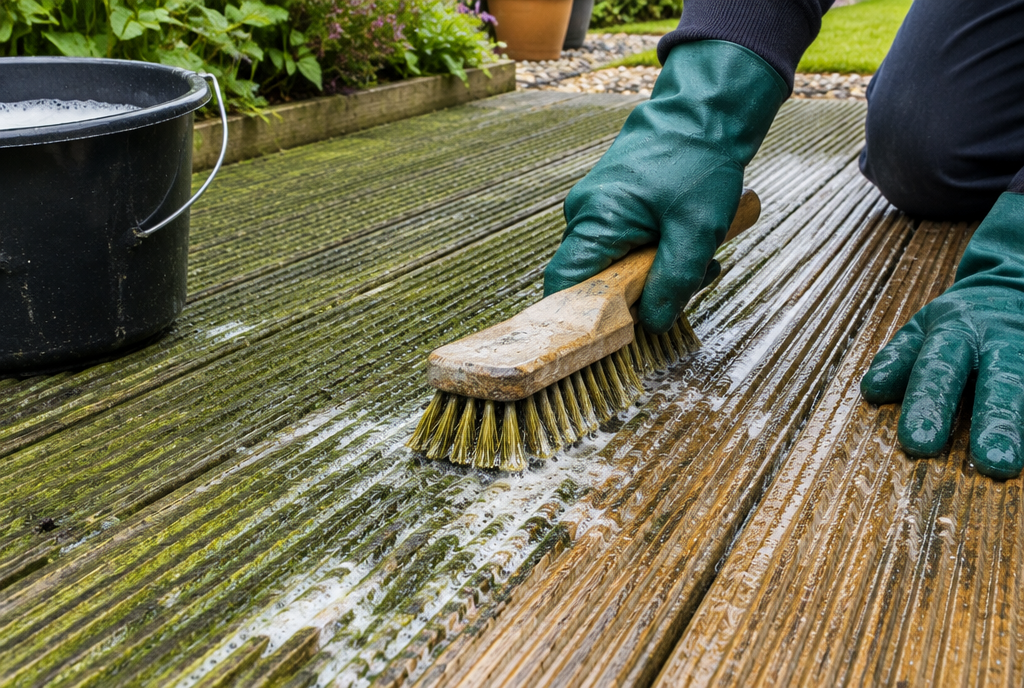
Knowing how to clean and restore decking properly is the difference between a deck you can safely walk on all winter and one that turns into a green, slippery hazard by November. In the UK, damp autumns, falling leaves and short days give algae and moss the perfect conditions to take hold on timber boards. The good news is that most decks look far better after a single afternoon of the right cleaning, and you can then protect them as soon as the weather allows.
This guide contains affiliate links. If you buy through them, we may earn a small commission at no extra cost to you. As an Amazon Associate I earn from qualifying purchases. Read our affiliate disclosure.
At a glance
- Difficulty: Easy to moderate – mostly elbow grease, no special skills
- Time needed: Half a day to clean a typical garden deck, plus at least a full dry day before any oil or stain goes on
- Best time to do it: Clean in autumn after the leaves have mostly fallen, then treat on a dry spring or summer day when it’s above 10°C
- Best for: Softwood (pressure-treated pine) decks that have gone grey, green or slippery; composite decks need a gentler version
Know what you’ve got before you start
The method depends on what your deck is made of and what’s already on it, so spend five minutes working this out first. Using the wrong product or too much pressure is the most common way people damage a perfectly sound deck.
Pressure-treated softwood
Most UK garden decks are pressure-treated pine or spruce, usually with grooved (ribbed) boards. These have often had a tint applied at the timber yard and will turn silver-grey within a year or two of sun and rain. Grey wood isn’t rotten – it’s just the surface fibres weathering – and a restorer can bring back much of the original colour.
Hardwood
Hardwoods such as iroko, balau or oak are denser and more naturally durable. They clean up the same way but need a softer touch, and they’re usually finished with a thin decking oil rather than a stain or paint.
Composite decking
Composite boards are a mix of wood fibre and plastic. They don’t need oiling or staining, and many manufacturers ask you to avoid harsh chemicals and high pressure because they can dull or streak the surface. Check your manufacturer’s care guide before you start, as using the wrong method may affect the warranty.
Already oiled, stained or painted?
Try the water test that Ronseal recommends in its product data sheet: splash some water on the boards. If it soaks in and darkens the wood, the surface is ready to clean and treat. If it beads on top, there’s still a finish or a factory pre-treatment present, and new oil won’t soak in properly. Painted or solid-stained decks that are flaking need stripping or sanding before you recoat, otherwise the new coat peels off with the old one.
Check for rot first
Push a screwdriver into a few boards, especially near the house wall, around planters and at board ends. If it sinks in easily or the wood feels soft and spongy, that board needs replacing rather than cleaning – no amount of restorer will fix rot. Also look underneath if you can: joists and posts sit closest to the ground and rot first.
What you’ll need
- Stiff broom and a hand brush
- Putty knife or old screwdriver (for clearing gaps between boards)
- Decking cleaner (for green, dirty decks) or a decking restorer (for grey, weathered decks) – check the label suits your deck type
- Stiff-bristled deck scrubbing brush on a long handle
- Garden hose with a spray nozzle, or a pressure washer with a wide fan nozzle
- Watering can or garden sprayer for applying the cleaner
- Dust sheets or old plastic sheeting to protect plants
- Rubber gloves, safety glasses and sturdy shoes with good grip
- For restoring later: decking oil or stain, a flat decking pad or wide brush, and end grain preserver for any cut ends
Step 1: Clear the deck and protect plants
Move furniture, pots, barbecues and mats off the deck entirely. Pots in particular leave dark rings and trap moisture, and you want to see every board. Cover lawn edges, borders and any plants next to the deck with sheeting – Toolstation’s guide warns that decking cleaner can harm plants and grass, and run-off goes straight into the soil.
Pick a dry, still day if you can. You don’t want wind blowing the cleaner onto your plants or rain diluting it before it has had time to work.
Step 2: Sweep and clear the gaps
Give the whole deck a thorough sweep along the length of the boards to get rid of leaves, soil and loose moss. Then run a putty knife or old screwdriver along every gap between the boards. Blocked gaps stop rainwater draining away, so the board edges stay wet and rot faster – this is one of the simplest maintenance jobs and one of the most overlooked.
Don’t forget the expansion gap around the edges of the deck, next to walls and fences. Leaves pile up there and hold damp against both the deck and the house.
Step 3: Apply the cleaner or restorer
Read the label first, as concentrated cleaners usually need diluting with water. Wet the boards lightly with the hose, then apply the cleaner with a watering can or sprayer, working in one small section at a time – roughly two or three boards wide. Ronseal’s guide to reviving grey decking specifically advises small sections, because a deck covered in wet product is extremely slippery.
Use the right product for the problem. A decking cleaner is designed to shift dirt, algae and green growth. A restorer (sometimes called a reviver) is stronger and is meant for grey, weathered timber, lifting the dead surface fibres to bring back the wood colour. If your deck is both green and grey, many people clean first and then use a restorer on any boards that are still grey.
Step 4: Let it work, then scrub along the grain
Leave the product to soak in for the time on the label. Ronseal suggests around 15 minutes for its restorer, while Toolstation’s guide gives 15 to 20 minutes for decking cleaner. Don’t let it dry out on the boards – if it’s a warm day, mist it with the hose to keep it wet.
Now scrub firmly with the stiff deck brush, always along the length of the boards rather than across them. On grooved boards, the dirt and algae live in the bottom of the ribs, and brushing along the grain gets the bristles right into them. Cross-grain scrubbing just skims the tops and can roughen the surface.

You’ll know it’s working when the foam turns grubby green or brown and the wood underneath looks noticeably lighter. Stubborn black spots are often mould that has grown into the grain; a second application usually lightens them, but they may never disappear completely.
Step 5: Rinse thoroughly
Rinse each section well before moving on, working from the house outwards so dirty water runs away from walls and doesn’t sit on clean boards. A garden hose with a good spray nozzle and a bit more scrubbing is enough for most decks.
If you’re using a pressure washer
A pressure washer speeds up rinsing, but it’s also the easiest way to ruin softwood. Too much pressure tears up the soft fibres, leaving a furry, splintery surface and forcing water deep into the timber. Homebuilding & Renovating’s advice is to use a low setting, keep the nozzle at least six inches from the boards and move steadily along the grain. Which? also warns against starting on the top setting – test on a hidden area first and use a wide fan nozzle rather than a rotary or pencil jet. If your boards are already splintered or soft, skip the pressure washer and use the hose.
Step 6: Let the deck dry completely
This is where most restoration jobs go wrong. Timber holds water deep in the board long after the surface looks dry, and oil or stain applied to damp wood won’t soak in, dries patchy and can peel. Allow at least a full dry day, and longer in cool weather – in late autumn in the UK, the boards may not dry properly for a week or more.
If you’re cleaning in October or November, it’s usually best to stop here. A clean deck will cope with winter far better than a dirty one, and you can do the protective coat in spring. Sweep off leaves every week or two over winter so the algae doesn’t come straight back.
Step 7: Protect the wood with oil or stain
Once the deck is bone dry and the forecast is settled, apply your chosen finish. Ronseal’s data sheet for its Ultimate Protection Decking Oil says not to apply it below 10°C, to apply two coats with about four hours between them, and that it’s rainproof after 90 minutes. Other brands vary, so always follow the tin.
Work along two or three boards at a time, from one end to the other, so you’re always brushing into wet edges. This avoids lap marks where fresh oil overlaps a part-dried section. Apply thin, even coats and wipe off any puddles in the grooves – too much oil stays sticky and attracts dirt. Treat any freshly cut board ends with end grain preserver, as cut ends soak up water fastest.
Keep pets and people off until it’s dry. Ronseal’s data sheet gives 4 hours for light foot traffic and 24 hours before heavy use, such as putting furniture back.
How often should you clean and treat decking?
Sweep regularly, especially in autumn when leaves are falling. Homebuilding & Renovating suggests a proper wash about twice a year for timber decks. How often you re-treat depends on the finish: according to the Timber Decking and Cladding Association (as reported by Homebuilding & Renovating), sealers with silicone or wax additives need reapplying roughly every year, translucent stains last around two to three years and solid stains or paints about five. Brand-new decking should normally be left to weather for around six months before its first treatment, according to Ronseal.
Common mistakes to avoid
- Blasting softwood with a pressure washer on full power. It furs and splinters the surface and can leave permanent stripes.
- Scrubbing across the grain. It misses the dirt in the grooves and roughens the boards.
- Using bleach as your main cleaner. It can lighten timber unevenly, kills plants it splashes on and isn’t recommended for composite boards. A product made for decking is safer and more predictable.
- Oiling or staining damp wood. The finish can’t soak in, so it stays tacky, dries blotchy or peels.
- Treating in cold weather. Many decking oils shouldn’t go on below 10°C, which rules out most UK days from late autumn to early spring.
- Leaving the gaps blocked. Water trapped between boards is a major cause of rot.
- Covering up rotten boards. A fresh coat of stain hides the problem but doesn’t stop it spreading.
When to call a professional
Call a decking specialist or a carpenter if you find soft or spongy boards in several places, wobbly balustrades, or posts and joists that have rotted – these are structural and safety problems, especially on raised decks. It’s also worth getting advice if the deck is built over a drain cover or against the house wall below the damp-proof course, as that can let damp into the house.
Frequently asked questions
Can I clean decking with washing-up liquid?
For light dirt, warm water with a squirt of washing-up liquid and a stiff brush works well, and it’s a common choice for composite decking. It won’t shift established algae or reverse greying on timber, though – for that you need a proper decking cleaner or restorer.
Is it bad to pressure wash decking?
Not if you do it gently. Use a low pressure setting, a wide fan nozzle and keep the tip a good distance from the boards, moving along the grain. The damage happens when people use full power or hold the jet too close, which tears up softwood fibres.
How do I stop my decking being slippery in winter?
Slipperiness is mainly caused by algae, moss and mould, so the best fix is a thorough clean in autumn and regular sweeping to keep leaves off. Clearing the gaps so the boards drain and dry faster also helps. If a deck is still slippery after cleaning, anti-slip decking treatments and grip strips are available.
Can I oil decking in autumn or winter?
Usually not. Most decking oils need the wood to be fully dry and the temperature to stay above about 10°C while they cure, with no rain due for a few hours. In the UK that normally means waiting until spring or summer – just clean the deck now and treat it later.
Will decking restorer get rid of the grey colour?
A restorer can bring back much of the natural colour by lifting the weathered grey surface fibres. Very old or deeply weathered boards may need a second application or a light sand, and the wood will go grey again within a year or two unless you protect it with oil or stain.
Related guides: How to Prepare Your Garden for Winter: A UK Checklist · How to Clear and Fix a Leaking Gutter: UK Guide · 10 DIY Tools Every UK Home Should Have
Our picks for this job
These are the three things that do most of the work when cleaning and restoring a timber deck.

Decking cleaner
Lifts algae, moss and grime from timber boards so they’re safe underfoot again.

Stiff deck scrubbing brush
Long handle and stiff bristles that reach into the grooves without kneeling.

Decking oil and applicator pad
For protecting the clean, dry boards once the weather is warm enough.
Buttons go to Amazon UK. If you buy, we may earn a small commission at no extra cost to you.
Leave a Reply