
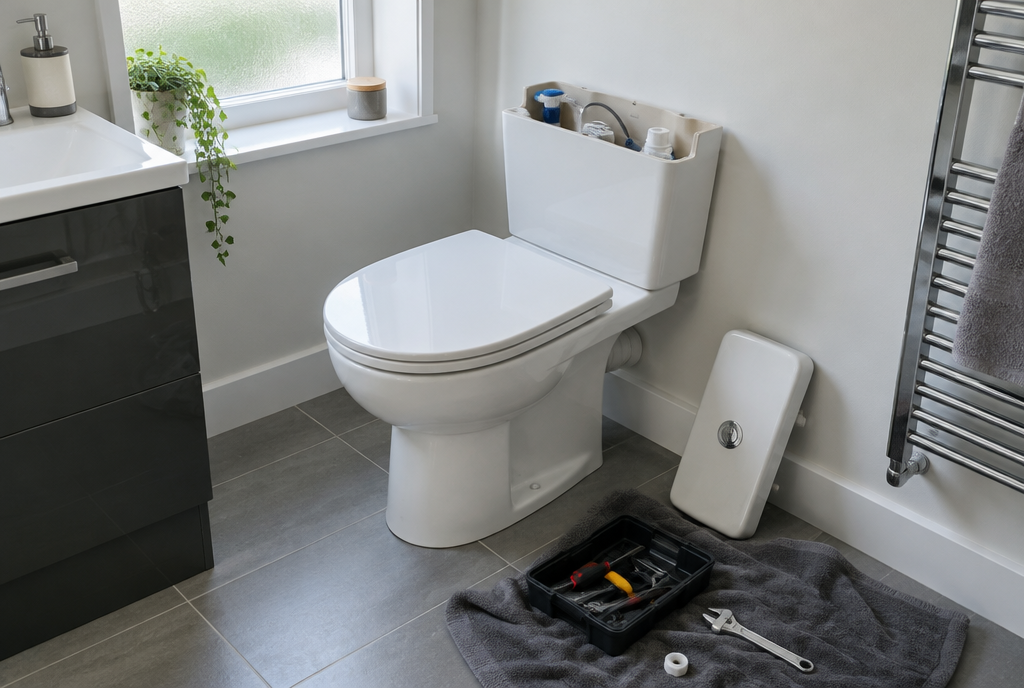
A toilet that keeps running after you flush is more than an annoying trickle in the background – it quietly sends clean water straight down the drain, day and night. The good news is that you can fix a running toilet yourself in most cases, usually with nothing more than a screwdriver and a cheap replacement part. This guide walks you through finding the cause and sorting it, step by step, for the kinds of toilets found in most UK homes.
This guide contains affiliate links. If you buy through them, we may earn a small commission at no extra cost to you. As an Amazon Associate I earn from qualifying purchases. Read our affiliate disclosure.
Why a toilet keeps running
Inside your cistern there are two main parts. The fill valve (sometimes called the float valve or inlet valve) lets water in after a flush and shuts off when the float rises. The flush valve lets water out into the pan when you press the button or pull the lever. A constantly running toilet almost always comes down to one of these two:
- The water level is set too high, so water keeps spilling into the overflow. In most modern UK cisterns the overflow is built into the flush valve and drains into the pan, so you’ll just see a thin stream running down the back of the bowl. Older cisterns may have an external overflow pipe that drips outside.
- The fill valve doesn’t shut off fully because it’s worn, furred up with limescale or has a bit of grit stuck in it.
- The flush valve seal is leaking, so water seeps past the washer at the bottom of the cistern into the pan. The cistern then slowly empties and the fill valve keeps topping it up.
It’s worth fixing sooner rather than later. According to the water-saving charity Waterwise, a leaking loo can waste between 200 and 400 litres of water a day, which adds up quickly if you’re on a water meter.
What you’ll need
- Flathead screwdriver (for the isolation valve and float adjustments)
- Adjustable spanner
- Old towels and a small bowl or sponge
- Toilet paper or a few drops of food colouring (for testing)
- Rubber gloves
- Replacement flush valve seal washer – only if the seal is the problem
- Replacement fill valve – only if the old one can’t be adjusted or cleaned
Before buying any parts, take a photo of what’s inside your cistern and note whether your fill valve is fed from the side or the bottom. That makes it much easier to pick the right replacement.
Step 1: Lift the lid and find where the water is going
Carefully lift off the cistern lid and lay it somewhere safe on a towel – ceramic lids crack easily. If you have a push-button flush, the button usually unscrews or lifts out first, and you may need to disconnect a cable or rod underneath.
Now watch and listen. If the water is up at the top of the overflow tube and spilling into it, the fill valve is the culprit. If the water level is below the overflow but you can hear the valve refilling every so often, water is escaping through the flush valve seal.
Not sure? Try the paper test: dry the back of the pan, stick a square of toilet paper to it and leave it overnight without flushing. If it’s wet in the morning, you’ve got a leak. Alternatively, add a few drops of food colouring to the cistern and wait 20–30 minutes without flushing – coloured water in the bowl points to a leaking flush valve.
Step 2: Turn off the water at the isolation valve
Look for a small isolation valve on the pipe feeding the cistern. Most have a slot on top: use a flathead screwdriver to turn it a quarter turn so the slot sits across the pipe rather than along it. Some have a small lever or handle instead. Flush the toilet and check the cistern doesn’t refill.
If there’s no isolation valve, or it won’t budge, turn off the water at your main stopcock instead (often under the kitchen sink). Don’t force a stiff isolation valve – they can snap.
Step 3: Lower the water level on the fill valve
If water was spilling into the overflow, start here – it’s the quickest fix. Most modern fill valves have a float that slides up and down a vertical stem, adjusted by a clip, a threaded rod or a small screw. Move the float down a little so the valve shuts off earlier. On an older ball-and-arm valve, there’s usually an adjusting screw near the pivot; failing that, the arm can be very gently bent downwards.

Turn the water back on and let the cistern fill. Many cisterns have a water-level mark moulded inside; aim for that, or roughly 2–3cm below the top of the overflow tube. Flush a couple of times and check the level settles in the same place.
Step 4: Clean or replace a faulty fill valve
If the level is set correctly but water still creeps up into the overflow, the fill valve isn’t sealing. Grit and limescale are common causes, especially in hard-water areas. With the water off, many valves let you twist off the top cap to reach a small rubber diaphragm or washer. Rinse it under the tap, wipe away any debris and refit it. Check the manufacturer’s instructions if you can find the model, as designs vary.
If cleaning doesn’t help, or the valve is cracked or very old, replace it. With the water off, flush and sponge out the cistern, then put a towel underneath. Undo the supply connector under the cistern (side-entry valves connect at the side) with your adjustable spanner, then undo the plastic back nut holding the valve in place. Fit the new valve with its washer on the inside of the cistern, tighten the back nut by hand plus a little extra, reconnect the supply and set the float height as in Step 3. Turn the water on slowly and check every joint for drips.
Step 5: Replace a leaking flush valve seal
If the water was disappearing into the pan rather than the overflow, the seal at the bottom of the flush valve is the likely problem. With the water off and the cistern flushed and sponged dry, look at the flush valve. Many modern push-button drop valves unclip or twist out of their base with a quarter turn, without taking the cistern off the pan.

Check the rubber seal on the underside. If it’s split, flattened, hardened or coated in limescale, swap it for a new one of the same size – take the old one with you, or measure its diameter, as there are several common sizes. Sometimes a good clean of the seal and the seat it sits on is enough. Refit the valve until it clicks or locks into place, turn the water back on and repeat the paper or food colouring test.
If your flush valve doesn’t come out from the top, it may only be removable by taking the cistern off the pan. That’s a bigger job involving the cistern bolts and the seal between cistern and pan, and it’s one you might prefer to hand to a plumber.
Step 6: Check the flush mechanism isn’t sticking
Sometimes the valve itself is fine but the button or lever doesn’t let it drop back fully. On push-button flushes, check the button isn’t jammed down and that any cable or rod isn’t too tight. On lever flushes, check the linkage moves freely. Refit the button and lid carefully and flush a few times to make sure everything closes cleanly.
Common mistakes and troubleshooting
- Buying parts before diagnosing. A new fill valve won’t fix a leaking flush seal, and vice versa. Work out where the water is going first.
- Overtightening plastic nuts. Hand-tight plus a small turn is usually enough. Cranking them can crack the fitting or the cistern.
- Setting the water level too low. If the flush becomes weak after you adjust the float, raise it slightly.
- Fill valve is noisy or slow after replacing it. Make sure the isolation valve is fully open, and check whether your new valve suits your water pressure – some come with interchangeable parts for high and low pressure.
- Still running after a new seal. Check the seal is seated evenly with no grit underneath, and that the valve is fully locked into its base.
- Water on the floor. That’s a different problem – check the supply connector, the isolation valve and the joint between cistern and pan.
When to call a professional
Call a plumber if the cistern has to come off the pan and you’re not confident doing it, if the isolation valve or supply pipe is corroded or leaking, if the cistern itself is cracked, or if you have a concealed cistern hidden behind a panel that you can’t easily get to. If your toilet uses a macerator pump (common in loft or basement bathrooms), leave anything involving the pump or its electrics to a qualified engineer.
Related guides: How to Fix a Dripping Tap (UK Mixer and Pillar Taps) · How to Re-Grout Bathroom Tiles · How to Unblock a Sink Without Chemicals: 6 Easy Steps
Our picks for this job
These are the parts and tools that cover the most common running-toilet fixes.

Universal toilet fill valve
A quiet, adjustable replacement for a worn or furred-up inlet valve – check side or bottom entry first.

Flush valve seal washers
The cheap fix for water seeping into the pan – a multi-size pack covers most drop valves.

Adjustable spanner
Undoes supply connectors and back nuts without chewing up the fittings.
Buttons go to Amazon UK. If you buy, we may earn a small commission at no extra cost to you.
Leave a Reply